
Automating website screenshots helps developers, marketers, and product teams save time and eliminate repetitive manual work. By connecting Google Sheets with PeekShot using Make.com, you can create a reliable workflow that automatically captures website screenshots whenever new URLs are added to a spreadsheet.
This guide explains every step required to build a complete automation using PeekShot API, Google Sheets, and Make.com. It is designed for beginners and advanced users who want a clear, error-free setup.
What this integration does
This workflow connects three tools into one simple automation:
- Google Sheets stores the website URLs and capture settings.
- Make.com monitors the spreadsheet and triggers the automation.
- PeekShot API generates screenshots based on the data you send.
When a new row is added to the spreadsheet, Make.com detects it and sends the data to PeekShot. PeekShot captures the screenshot and stores the result in your account.
This setup is useful for website monitoring, reporting, testing, documentation, and client previews.
Requirements before you begin
Make sure you have:
- An active PeekShot account
- A Make.com account
- A Google account with Sheets access
- A basic understanding of spreadsheets
- A stable internet connection
Having these ready will prevent setup issues later.
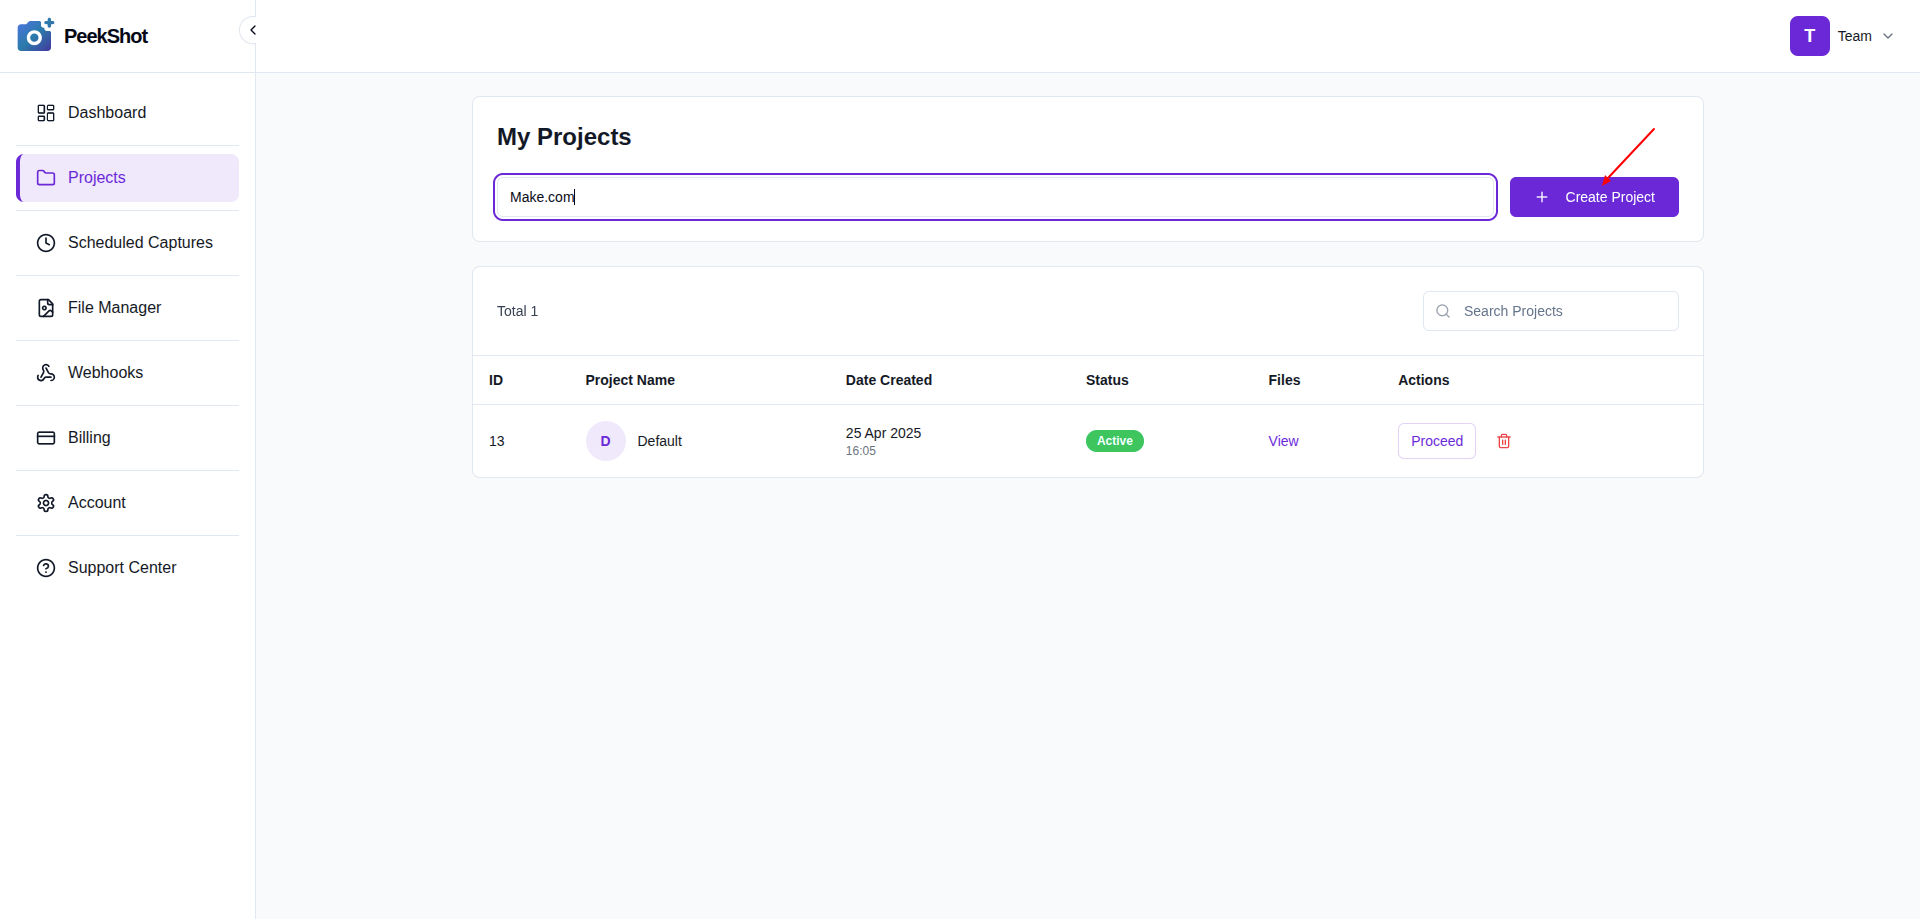
Step 1: Create a project in PeekShot
Projects in PeekShot help you organize screenshots and API usage.
- Log in to your PeekShot dashboard.
- Click
Projectsfrom the sidebar. - Enter a project name such as
Make.com. - Click
Create Project.
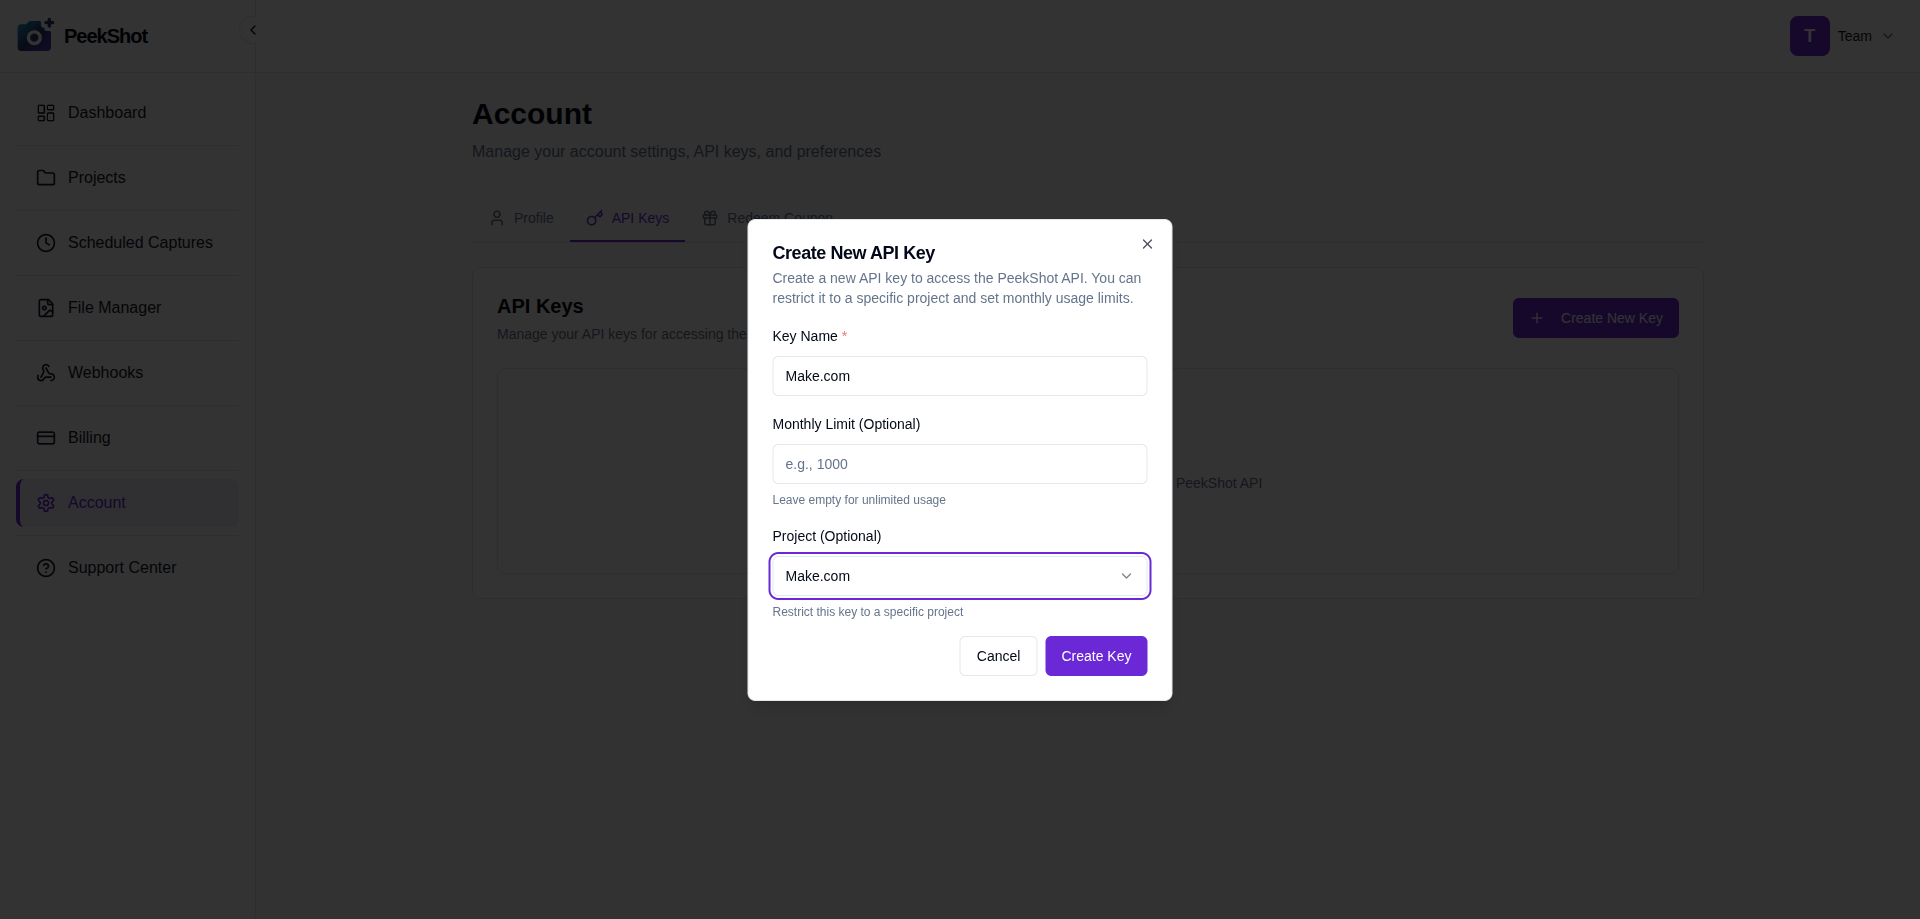
Step 2: Generate your PeekShot API key
The API key allows Make.com to access PeekShot securely.
- Go to
Accountfrom the sidebar. - Open the
API Keystab. - Click
Create New Key. - Enter a name such as
Make.com. - Select your created project.
- Click
Create Key.
Copy the generated API key and store it safely.
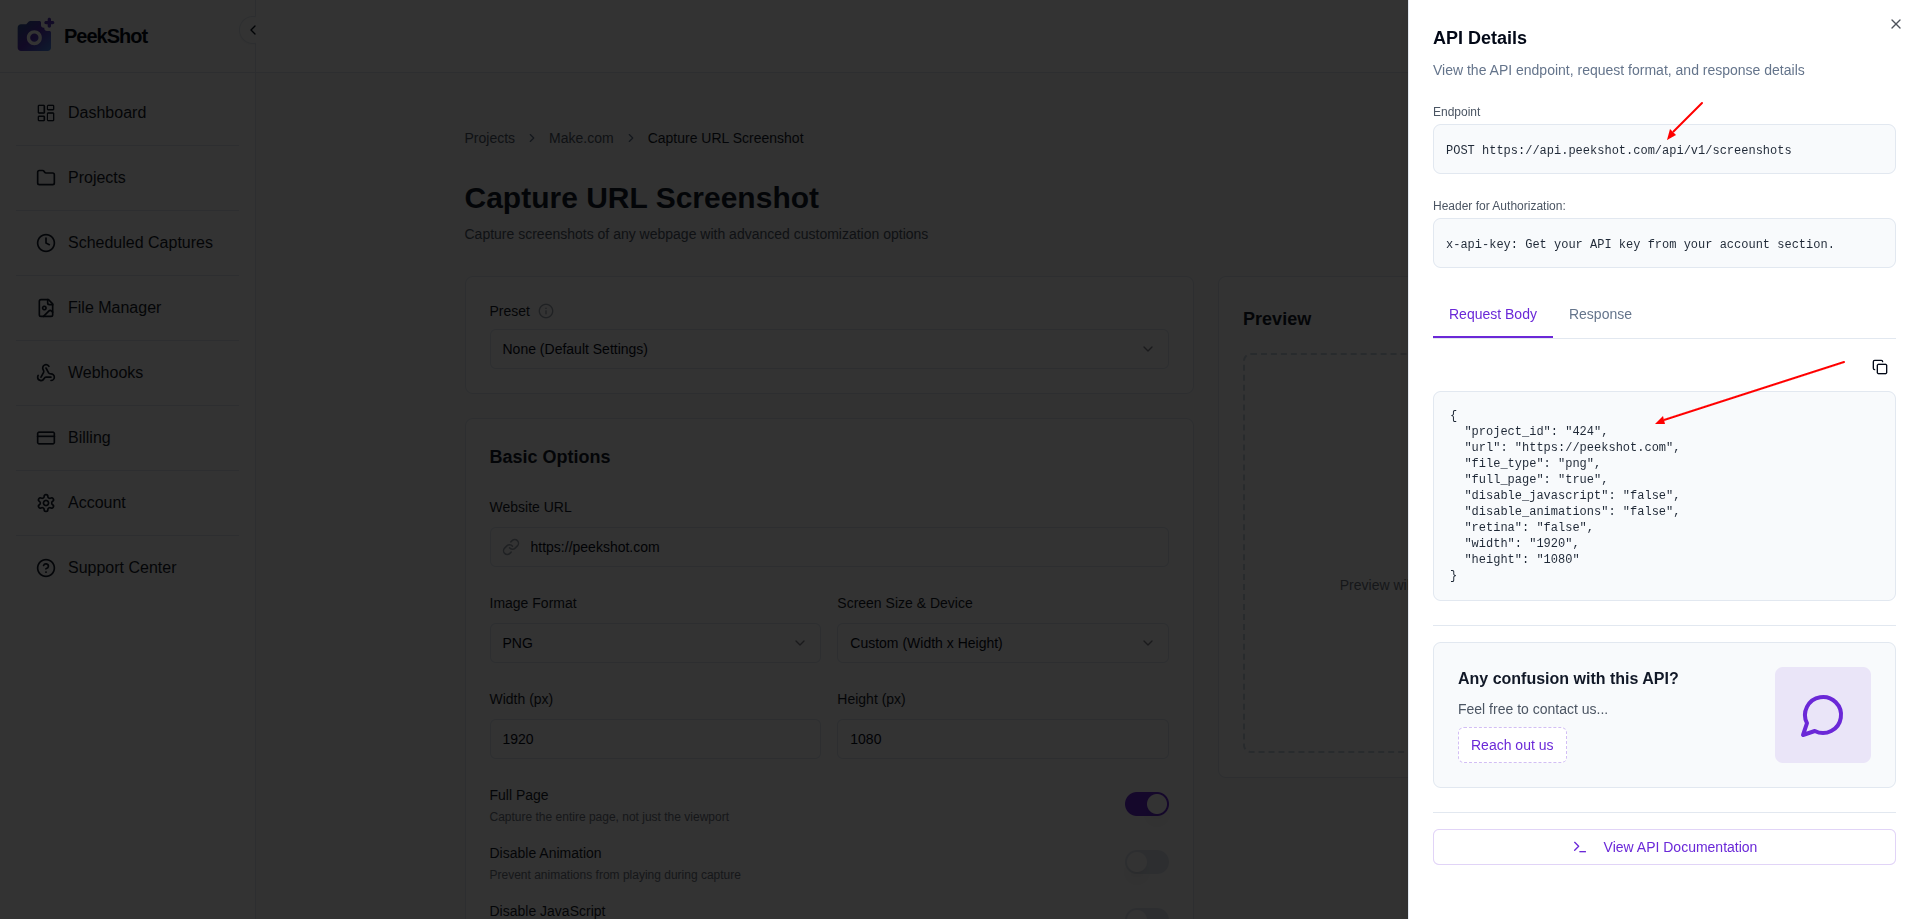
Step 3: Copy the API endpoint and request format
You need the correct endpoint and payload structure before configuring Make.com.
- Go to
Projectsand open your project. - Select
Capture URL Screenshot. - Click
API Details. - Copy the endpoint URL.
- Copy the request body example.
This information will be used in Make.com.
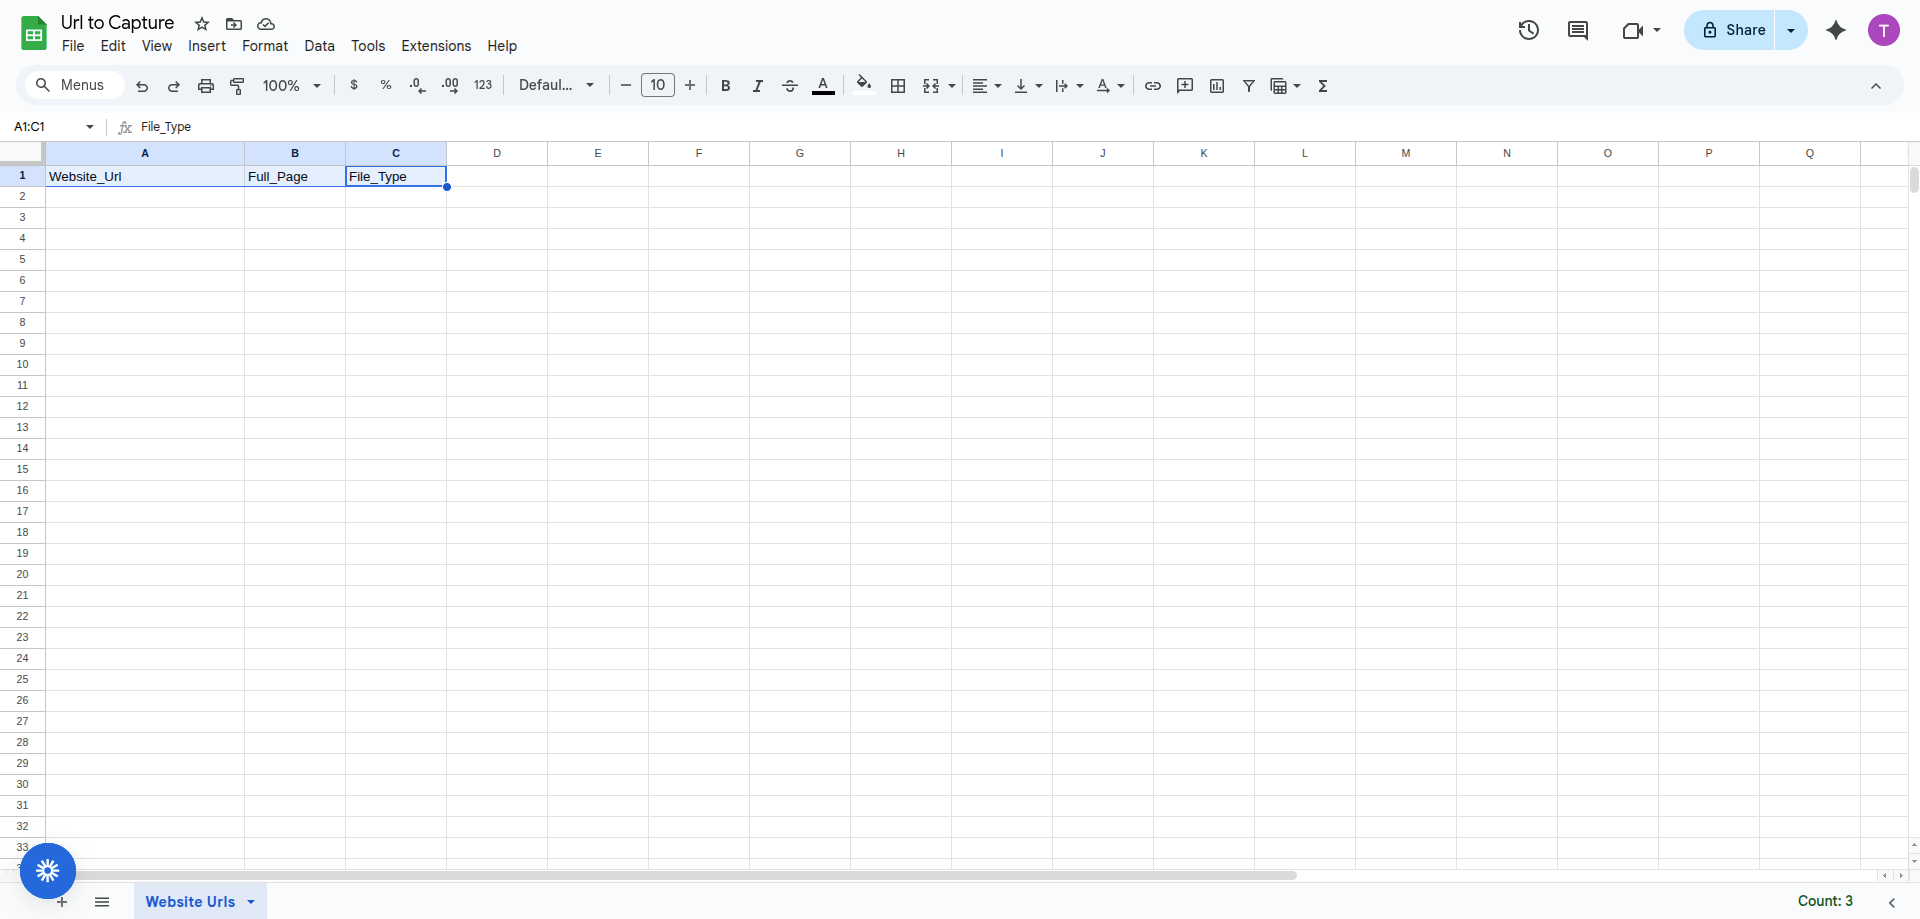
Step 4: Prepare your Google Sheet
Create a spreadsheet that will act as your automation trigger.
Create the following columns in row 1:
Website_UrlFull_PageFile_Type
Example values:
Website_Url:https://example.comFull_Page:TRUEorFALSEFile_Type:pngorjpg
Save the sheet with a clear name such as Url to Capture.
Step 5: Create a new scenario in Make.com
Scenarios control automation in Make.com.
- Log in to Make.com.
- Click
Create scenario. - Open the scenario editor.

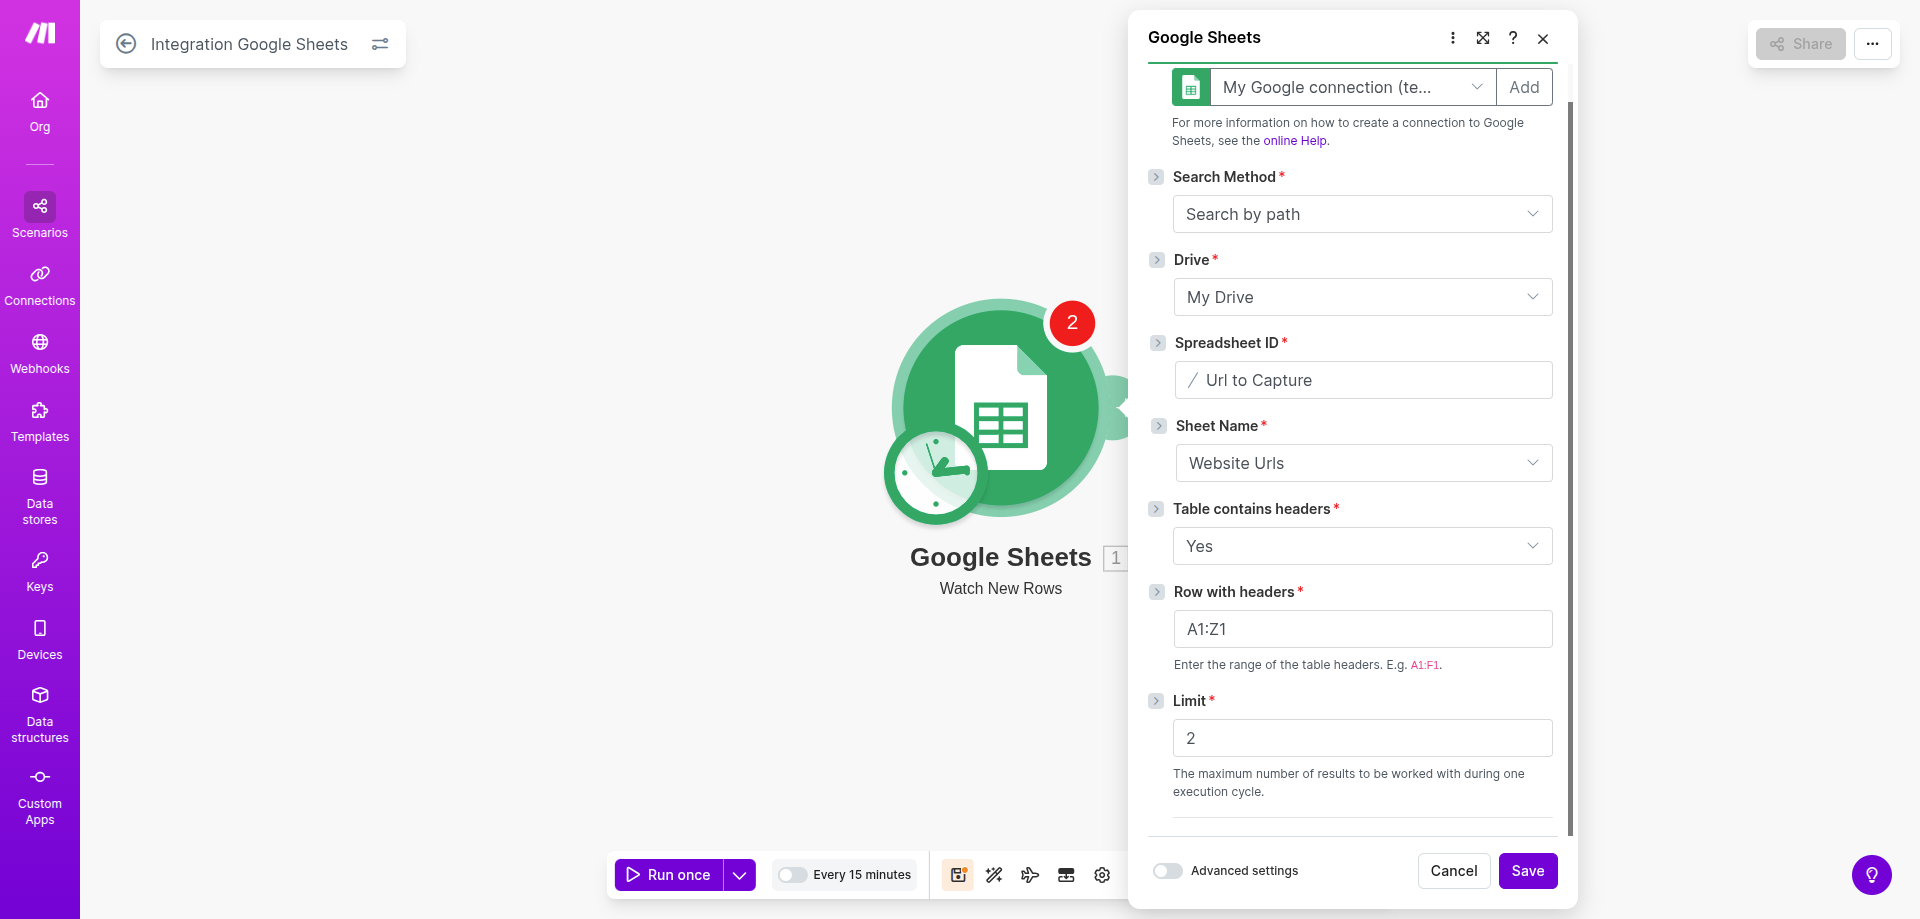
Step 6: Connect Google Sheets to Make.com
This module monitors new spreadsheet rows.
- Click the plus icon.
- Search for
Google Sheets. - Select
Watch New Rows. - Connect your Google account.
- Select your spreadsheet.
- Choose the correct sheet.
- Set
Table contains headerstoYes. - Set
Row with headerstoA1:Z1.
Save the module.
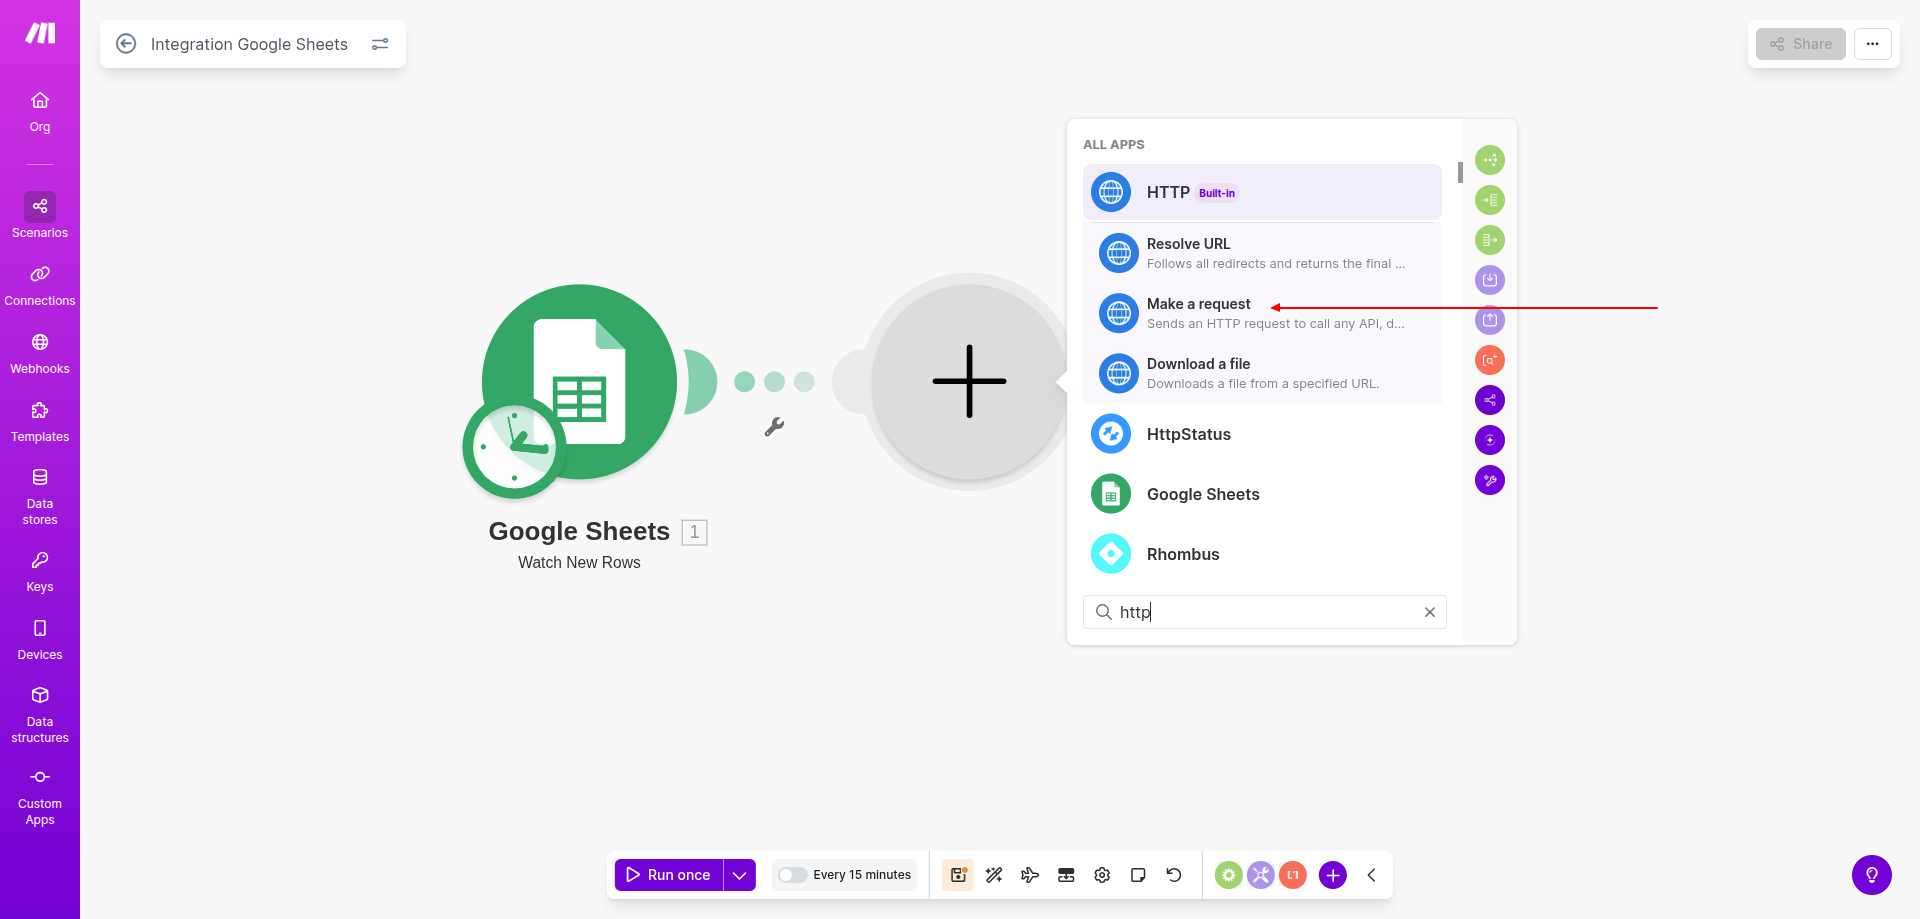
Step 7: Add the HTTP module for PeekShot API
This module sends requests to PeekShot.
- Click the plus icon next to Google Sheets.
- Search for
HTTP. - Select
Make a request.
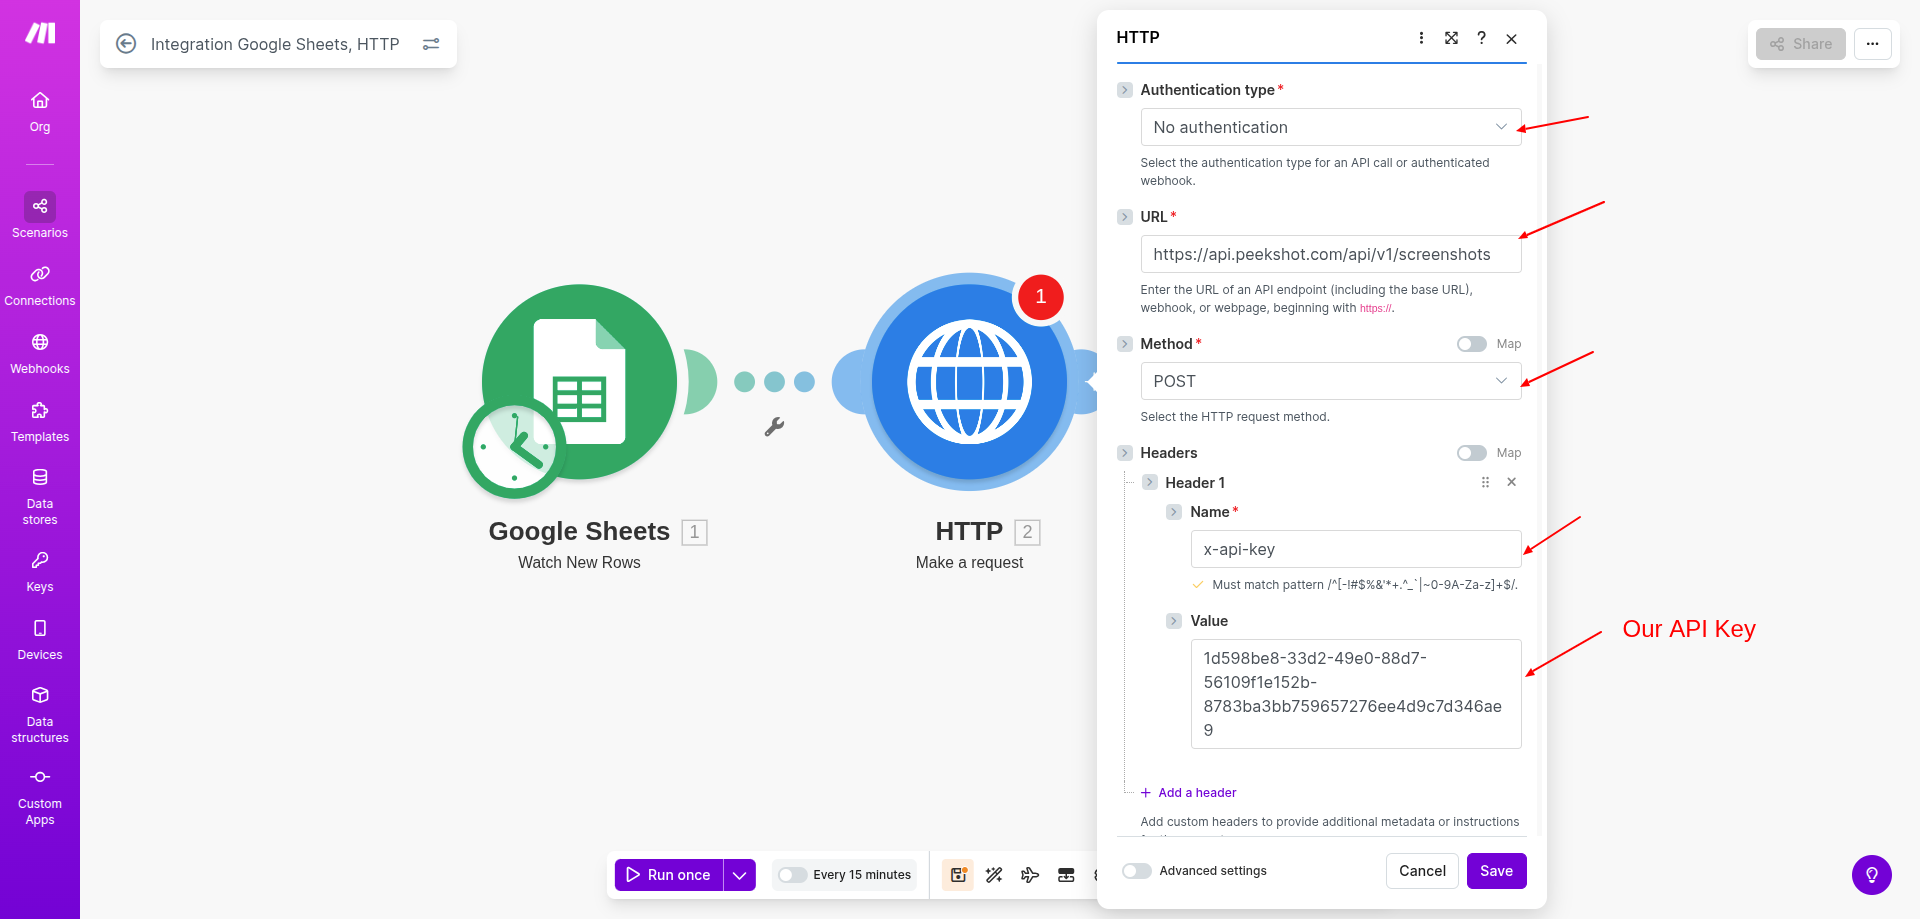
Step 8: Configure the HTTP request
Configure the API request carefully.
Set the following values:
Authentication:No authenticationURL: Paste the PeekShot API endpointMethod:POST
Under Headers, add:
Name:x-api-keyValue: Your PeekShot API key
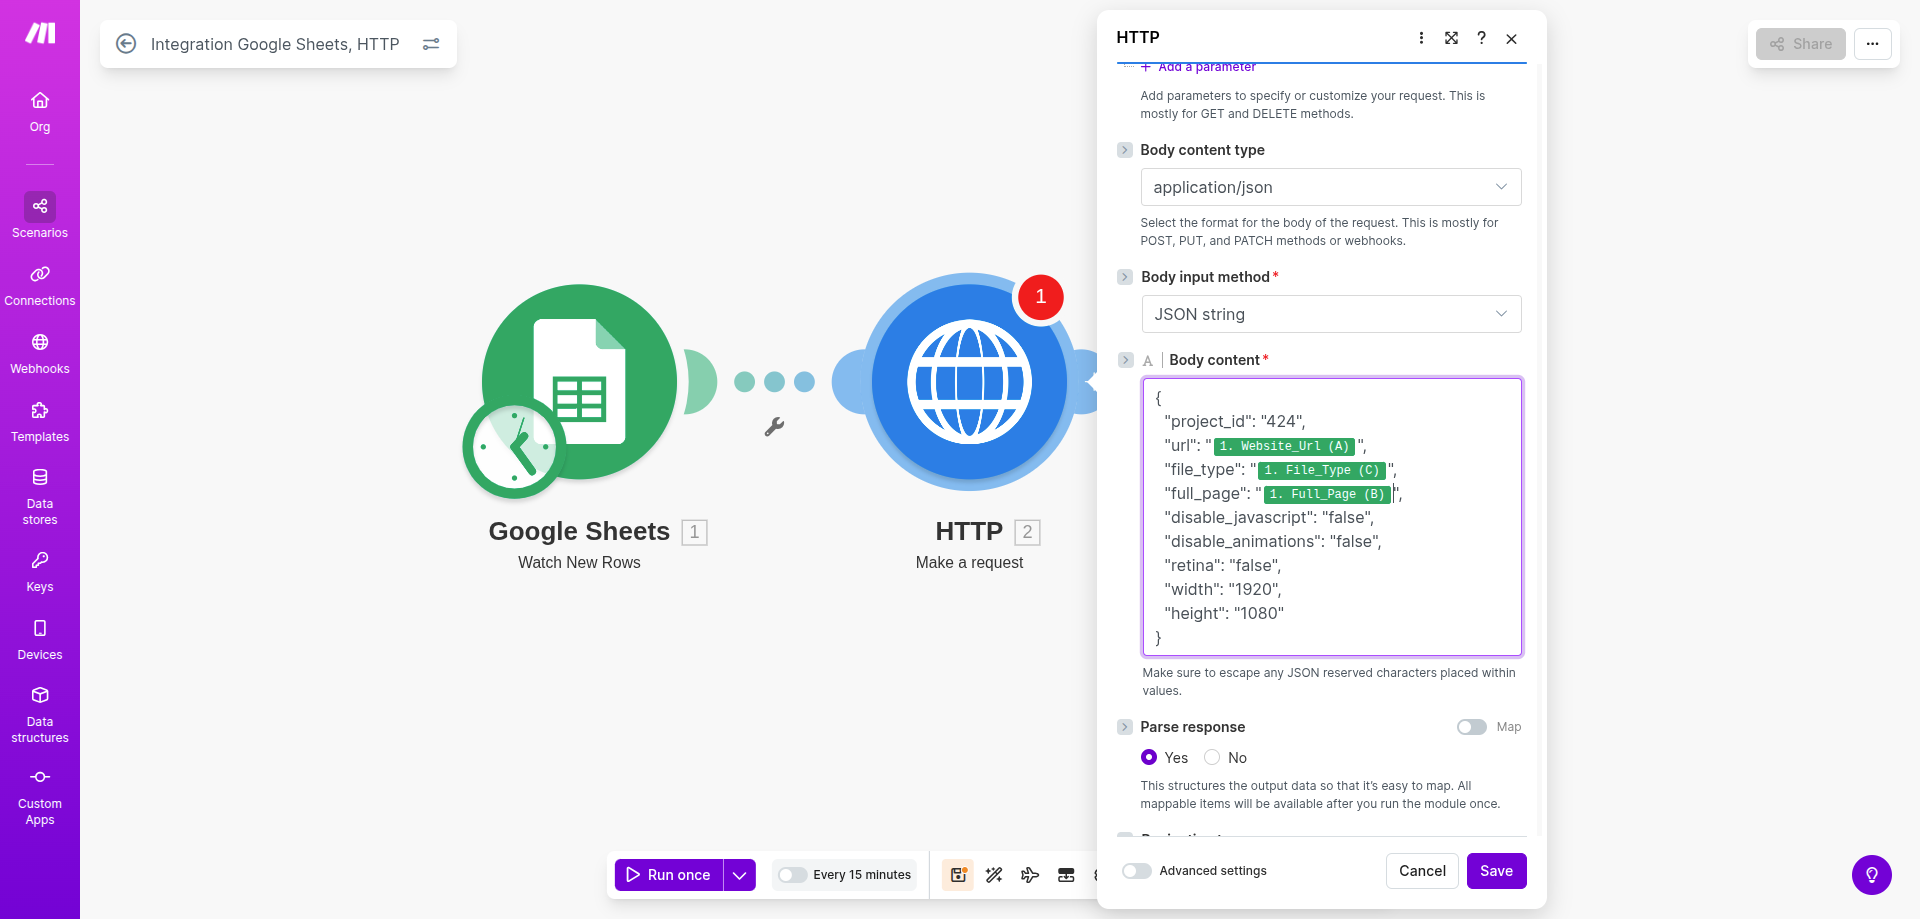
Set Body type to Raw JSON.
Paste the request body and map fields from Google Sheets.
Step 9: Map Google Sheet data to API fields
Connect spreadsheet columns to the API parameters.
Example mapping:
url->Website_Urlfull_page->Full_Pagefile_type->File_Type
This ensures each row is processed individually.
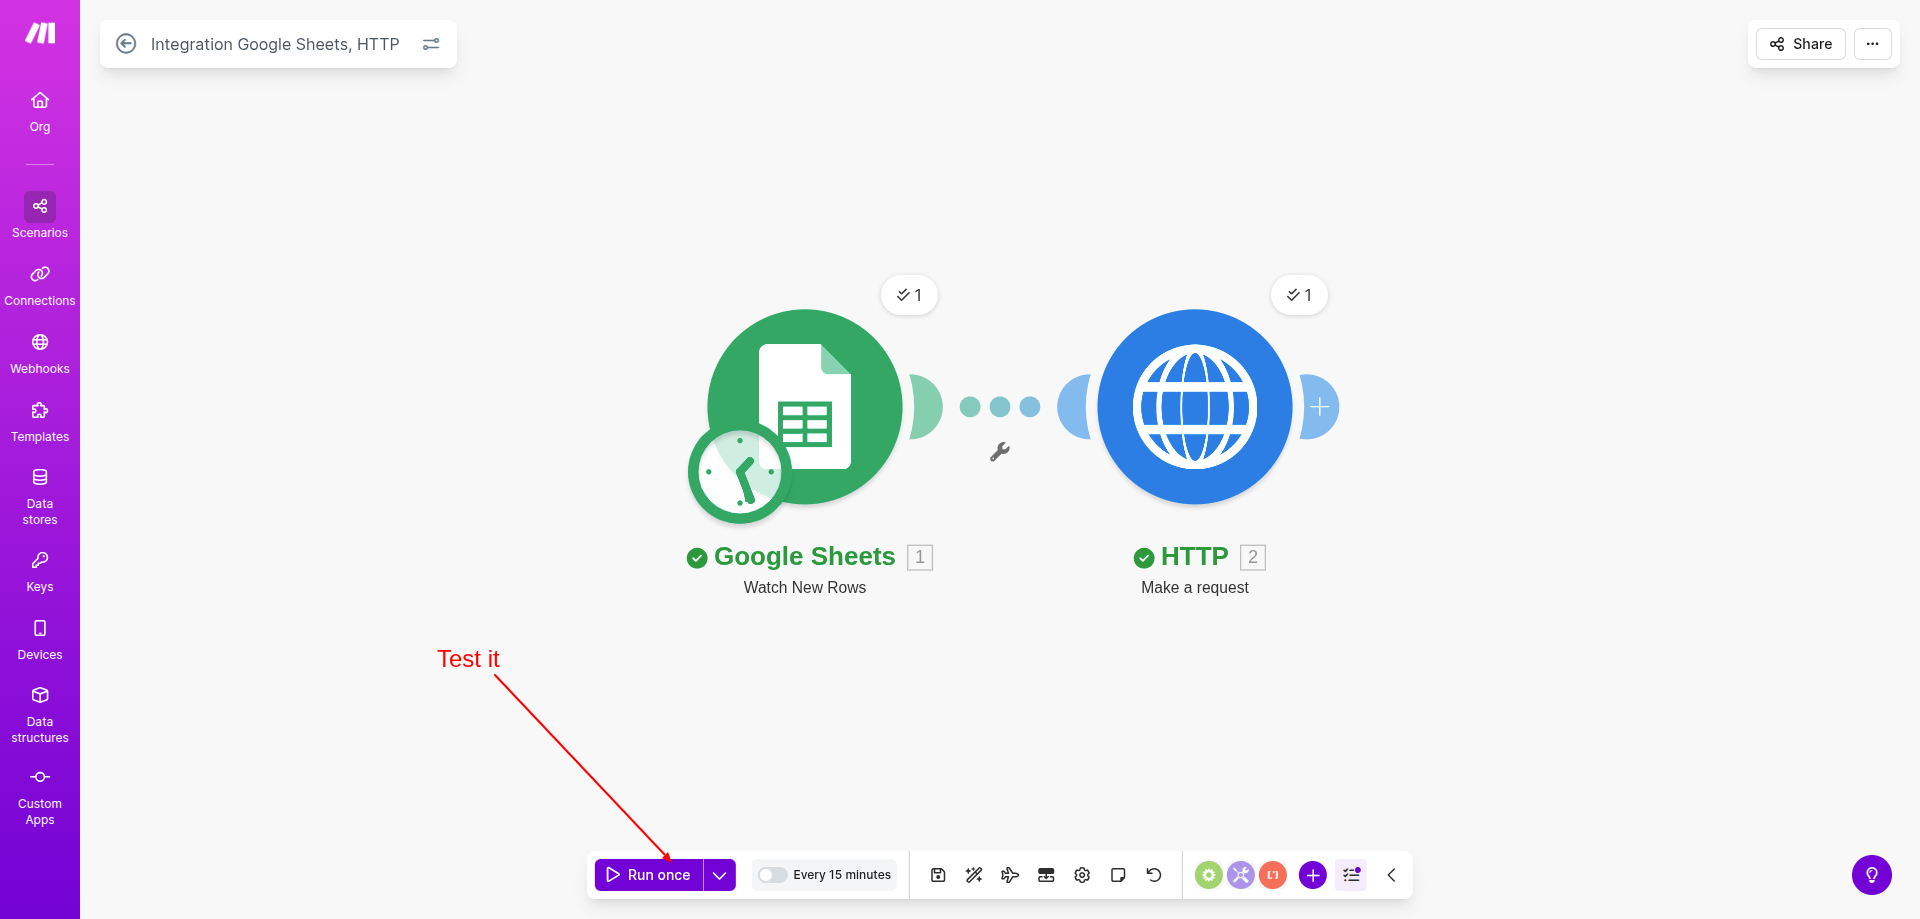
Step 10: Test the automation
Testing ensures everything works correctly.
- Click
Run oncein Make.com. - Add a new row in Google Sheets.
- Wait for execution.
- Check whether the HTTP module succeeds.
If errors appear, review the headers, endpoint URL, and mapped fields.
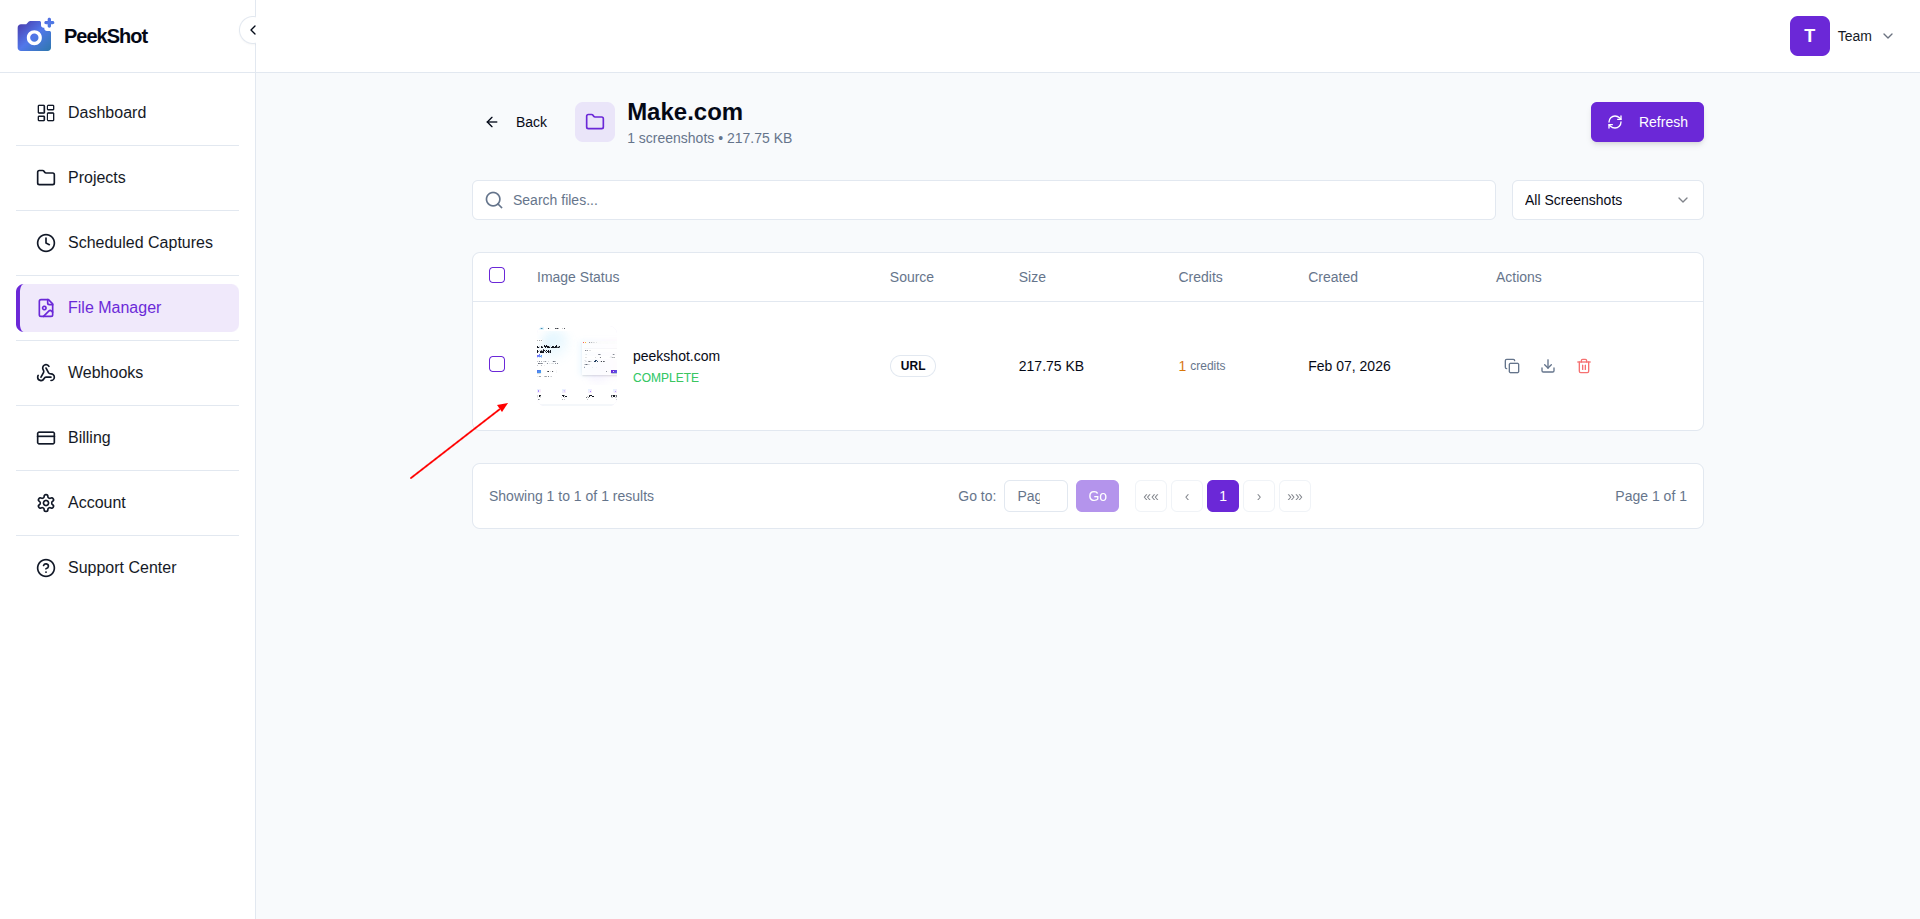
Step 11: Verify the screenshot in PeekShot
Confirm that PeekShot captured the image successfully.
- Open the PeekShot dashboard.
- Go to
File Manager. - Open your project folder.
- Locate the generated screenshot.
You can download or share it from there.
Step 12: Activate the scenario
Once testing is successful, enable automation.
- Turn on the scenario.
- Set an execution schedule if needed.
- Save the changes.
The workflow will now run automatically.
Common use cases
- Website change monitoring
- Marketing campaign reports
- UI testing automation
- Client website previews
- Visual documentation
Best practices
- Validate URLs before submission
- Protect API keys
- Limit bulk requests
- Monitor execution logs
- Keep the spreadsheet organized
Troubleshooting common issues
If screenshots are not generated:
- Verify that the API key is valid
- Check the HTTP headers
- Confirm the endpoint URL
- Review the JSON structure
- Ensure the sheet headers match the mapping
Most issues can be resolved by correcting the configuration.
Conclusion
Integrating Google Sheets with PeekShot using Make.com gives you a powerful no-code workflow for automated screenshot generation.
This setup reduces manual work, improves consistency, and supports scalable reporting and monitoring. Once configured, it can run continuously and grow with your team’s needs.